| *แก้ไขที่ 1 Caynogen ( android 2.3 ) ใช้ไม่ได้นะ เขาให้ไปใช้ S2E แทน เครื่องที่ทำสอบแล้วใช้งานได้ 1.Galaxy 5 (android 2.2) 2.Galaxy 551 (android 2.2) 3.Wellcom A86 (android 2.1) โปรแกรมที่ใช้ 1.MiniTools Partion Download More infomation ติดตั้งบนคอมนะ 2.Link2SD เงื่อนไข - ต้อง Root เครื่องก่อนนะ วิธีทำ ถ้าติดขัดอะไร ย้อนกลับไปทำขั้นตอนแรกอีกครั้งนะครับ เพราะผมก็ต้องไล่แบบนี้  1. ติดตั้งโปรแกรม Mini tools partition และ เสียบ Micro SD Card ด้วยนะ เพื่อที่เราจะแบ่ง Partition Memory card ไว้ลง App จากนั้น กดที่ ไดร์ของ memory แล้วกดปุ่ม Move/Resize ด้านบนซ้าย  2. ขึ้น Popup เด้งมากให้ลด ขนาด memory ดูตรงที่ Partition size ลดลง แต่ตรง unallocation มีเพิ่มขึ้น (ผมแบ่งออกไป 193.xx mb) แล้วกด Ok ไป  3. เห็นไหมครับจะได้พื้นที่ unallocation  4. เลือกที่ไดร์ unallocation แล้วกด Creation partition  5. ตอบ Ok ไป  6. เลือกตามรูปเลยครับ  7. จะได้ตามรูป จากนั้นกด Apply ซ้ายบน  8. ตอบ Yes  9. รอครับ  10. ตอบตกลงเป็นอันเสร็จครับ  11. ลง App ให้เรียบร้อยนะ  12. เลือก ext2 ครับ เพราะเรา format card แบบนี้  13. Allow ไปนะ  14 . OK  15. กดปุ่ม Menu ที่เครื่อง เลือก More  16. เลือก Reboot  17. รอ  18. เปิดโปรแกรมอีกรอบ จะได้หน้าตาแบบรี้ แปลว่าทำเสร็จแล้วนะ  19 กดปุ่ม Menu แล้วเลือก Stroage info เพื่อดูรายละเอียด  20. รายละเอียดครับ ----------------------------------------------- ตัวอย่างการย้าย App นะ      |
วันเสาร์ที่ 25 สิงหาคม พ.ศ. 2555
วิธีใช้งาน + ติดตั้ง App Link2SD (ลง App ไว้ที่ memory ทุกตัวนะ )
วันเสาร์ที่ 11 สิงหาคม พ.ศ. 2555
ติดต่อฐานข้อมูล MSSQL ด้วย PHP
PHP SQL Server Connect to Database (mssql) การเขียน PHP กับ SQL Server นั้นก็เป็นเรื่องที่สามารถทำได้ง่าย เหมือนกับMySQL ครับ เพราะ PHP ได้เตรียมฟังก์ชั่น mssql ไว้สำหรับการติดต่อกับฐานข้อมูลโดยเฉพาะซึ่งสามารถเรียกใช้งานได้ในทันที
mssql_error()
ถ้าเกิดข้อผิดพลาดตามที่ผมยกตัวอย่างให้ให้ทำการดาวน์โหลดตัว extension ชื่อ php_mssql.dll
php_mssql.dll
ไปไว้ในโฟเดอร์ extension ของ php เช่น C:\AppServ\php5\ext หรือสามารถตรวจสอบ Path ได้ที่ php.ini
Start -> Run -> php.ini
Copy ntwdblib.dll ไปไว้ที่ C:\Windows\system32\
และก็ Restart Apache หรือ Web Server ด้วยน่ะครับ เสร็จแล้วเป็นอันใช้ได้
Syntax
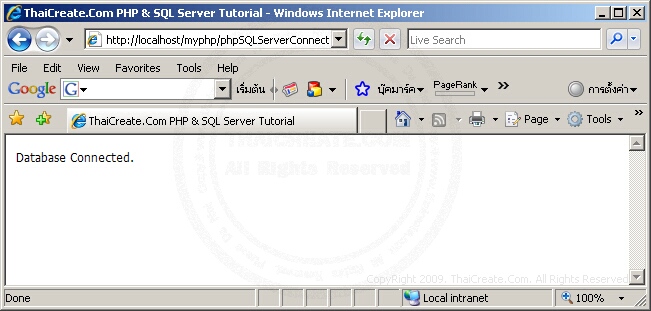
ตัวอย่างการเขียนติดต่อ PHP กับ SQL Server ผ่าน mssql
phpSQLServerConnect.php

SQL Server 2005
SQL Server 2008
Reference : http://www.thaicreate.com/php-manual/ref.mssql.html
mssql_error()
Warning: mssql_connect() [function.mssql-connect]: Unable to connect
to server: localhost in C:\AppServ\www\myphp\phpSQLServerConnect.php on line 7
to server: localhost in C:\AppServ\www\myphp\phpSQLServerConnect.php on line 7
ถ้าเกิดข้อผิดพลาดตามที่ผมยกตัวอย่างให้ให้ทำการดาวน์โหลดตัว extension ชื่อ php_mssql.dll
php_mssql.dll
ไปไว้ในโฟเดอร์ extension ของ php เช่น C:\AppServ\php5\ext หรือสามารถตรวจสอบ Path ได้ที่ php.ini
Start -> Run -> php.ini
extension_dir = "C:/AppServ\php5\ext"
.
.
.
.
.
extension=php_mssql.dll
.
.
.
.
.
extension=php_mssql.dll
Copy ntwdblib.dll ไปไว้ที่ C:\Windows\system32\
และก็ Restart Apache หรือ Web Server ด้วยน่ะครับ เสร็จแล้วเป็นอันใช้ได้
Syntax
$objConnect = mssql_connect($host,$user,$pass);
$host = server,ip,computer-name
$user = user
$pass = password
$host = server,ip,computer-name
$user = user
$pass = password
ตัวอย่างการเขียนติดต่อ PHP กับ SQL Server ผ่าน mssql
phpSQLServerConnect.php
01.<html>02.<head>03.<title>ThaiCreate.Com PHP & SQL Server Tutorial</title>04.</head>05.<body>06.<?07.$objConnect = mssql_connect("localhost","sa","");08.if($objConnect)09.{10.echo "Database Connected.";11.}12.else13.{14.echo "Database Connect Failed.";15.}16. 17.mssql_close($objConnect);18.?>19.</body>20.</html>
SQL Server 2005
SQL Server 2008
Reference : http://www.thaicreate.com/php-manual/ref.mssql.html
วันเสาร์ที่ 4 สิงหาคม พ.ศ. 2555
How to: Copy, Delete, and Move Files and Folders (C# Programming Guide)
How to: Copy, Delete, and Move Files and Folders (C# Programming Guide)
The following example shows how to copy files and directories.
// Simple synchronous file copy operations with no user interface.
// To run this sample, first create the following directories and files:
// C:\Users\Public\TestFolder
// C:\Users\Public\TestFolder\test.txt
// C:\Users\Public\TestFolder\SubDir\test.txt
public class SimpleFileCopy
{
    static void Main()
    {
        string fileName = "test.txt";
        string sourcePath = @"C:\Users\Public\TestFolder";
        string targetPath =  @"C:\Users\Public\TestFolder\SubDir";

        // Use Path class to manipulate file and directory paths.
        string sourceFile = System.IO.Path.Combine(sourcePath, fileName);
        string destFile = System.IO.Path.Combine(targetPath, fileName);

        // To copy a folder's contents to a new location:
        // Create a new target folder, if necessary.
        if (!System.IO.Directory.Exists(targetPath))
        {
            System.IO.Directory.CreateDirectory(targetPath);
        }

        // To copy a file to another location and
        // overwrite the destination file if it already exists.
        System.IO.File.Copy(sourceFile, destFile, true);

        // To copy all the files in one directory to another directory.
        // Get the files in the source folder. (To recursively iterate through
        // all subfolders under the current directory, see
        // "How to: Iterate Through a Directory Tree.")
        // Note: Check for target path was performed previously
        //       in this code example.
        if (System.IO.Directory.Exists(sourcePath))
        {
            string[] files = System.IO.Directory.GetFiles(sourcePath);

            // Copy the files and overwrite destination files if they already exist.
            foreach (string s in files)
            {
                // Use static Path methods to extract only the file name from the path.
                fileName = System.IO.Path.GetFileName(s);
                destFile = System.IO.Path.Combine(targetPath, fileName);
                System.IO.File.Copy(s, destFile, true);
            }
        }
        else
        {
            Console.WriteLine("Source path does not exist!");
        }

        // Keep console window open in debug mode.
        Console.WriteLine("Press any key to exit.");
        Console.ReadKey();
    }
}
The following example shows how to move files and directories.
// Simple synchronous file move operations with no user interface.
public class SimpleFileMove
{
    static void Main()
    {
        string sourceFile = @"C:\Users\Public\public\test.txt";
        string destinationFile = @"C:\Users\Public\private\test.txt";

        // To move a file or folder to a new location:
        System.IO.File.Move(sourceFile, destinationFile);

        // To move an entire directory. To programmatically modify or combine
        // path strings, use the System.IO.Path class.
        System.IO.Directory.Move(@"C:\Users\Public\public\test\", @"C:\Users\Public\private");
    }
}
The following example shows how to delete files and directories.
// Simple synchronous file deletion operations with no user interface.
// To run this sample, create the following files on your drive:
// C:\Users\Public\DeleteTest\test1.txt
// C:\Users\Public\DeleteTest\test2.txt
// C:\Users\Public\DeleteTest\SubDir\test2.txt

public class SimpleFileDelete
{
    static void Main()
    {
        // Delete a file by using File class static method...
        if(System.IO.File.Exists(@"C:\Users\Public\DeleteTest\test.txt"))
        {
            // Use a try block to catch IOExceptions, to
            // handle the case of the file already being
            // opened by another process.
            try
            {
                System.IO.File.Delete(@"C:\Users\Public\DeleteTest\test.txt");
            }
            catch (System.IO.IOException e)
            {
                Console.WriteLine(e.Message);
                return;
            }
        }

        // ...or by using FileInfo instance method.
        System.IO.FileInfo fi = new System.IO.FileInfo(@"C:\Users\Public\DeleteTest\test2.txt");
        try
        {
            fi.Delete();
        }
        catch (System.IO.IOException e)
        {
            Console.WriteLine(e.Message);
        }

        // Delete a directory. Must be writable or empty.
        try
        {
            System.IO.Directory.Delete(@"C:\Users\Public\DeleteTest");
        }
        catch (System.IO.IOException e)
        {
            Console.WriteLine(e.Message);
        }
        // Delete a directory and all subdirectories with Directory static method...
        if(System.IO.Directory.Exists(@"C:\Users\Public\DeleteTest"))
        {
            try
            {
                System.IO.Directory.Delete(@"C:\Users\Public\DeleteTest", true);
            }

            catch (System.IO.IOException e)
            {
                Console.WriteLine(e.Message);
            }
        }

        // ...or with DirectoryInfo instance method.
        System.IO.DirectoryInfo di = new System.IO.DirectoryInfo(@"C:\Users\Public\public");
        // Delete this dir and all subdirs.
        try
        {
            di.Delete(true);
        }
        catch (System.IO.IOException e)
        {
            Console.WriteLine(e.Message);
        }

    }
}
สมัครสมาชิก:
ความคิดเห็น (Atom)