การติดตั้ง argosoft mail server
ดาวน์โหลด argosoft mail server เมื่อท่านคลิกเข้าไปที่ลิ้งก์ ท่านจะเจอกับหน้าที่ให้ป้อนอีเมล์เพื่อขอโปรแกรม ท่านก็ป้อนเสียหน่อย แล้วกด OK ไป จากนั้นมันก็จะขึ้นหน้าจอให้ท่านคลิกเลือกดาวน์โหลด ว่าจะเอาจากเซิฟเวอร์ไหน กดมันไปสักอันละกัน เร็วช้าพอๆกันแหละ เรามันพวกอินเตอร์เน็ตความเร็วสูง ไม่ต้องกลัว
เมื่อเจอหน้าจอนี้คลิก Next ไป


เลือก I Agree แล้วก็คลิก Next ต่อไป


เลือก Everyone แล้ว Next


Next เพราะมันไม่มีอะไรต้องเลือก


หลังจาก progress bar วิ่งปรู้ดๆอยู่สักแป้บ การติดตั้งก็เป็นอันเสร็จเรียบร้อย เราก็แค่คลิก Close เป็นอันเสร็จสิ้นกระบวนการติดตั้ง


เมื่อติดตั้งเป็นที่เรียบร้อยแล้ว ต่อไปเราก็มาตั้งค่า argosoft mail server ให้สา่มารถรับส่งอีเมล์ได้
การตั้งค่า argosoft mail server
เปิด argosoft mail server ขึ้นมา คลิก start มันซะ ดูที่ภาพปุ่มแรก , เสร็จแล้ว คลิก Options (ปุ่มที่ 3 ที่เป็นรูปฟันเฟือง) ติ๊กเลือกตามภาพ แล้ว OK

ติ๊ก Load server at window startup พอเปิดเครื่องปุ่มก็ให้มันโหลดเซิอวิส mail server ขึ้นมาเลย
ติ๊ก Start Automatically when Launched เพื่อให้มันรันหลังเปิดเครื่องทุกครั้ง

ติ๊ก Load server at window startup พอเปิดเครื่องปุ่มก็ให้มันโหลดเซิอวิส mail server ขึ้นมาเลย
ติ๊ก Start Automatically when Launched เพื่อให้มันรันหลังเปิดเครื่องทุกครั้ง
คลิกปุ่ม Users and Domains เพื่อทำการเพิ่มชื่อโดเมนและชื่ออีเมล์ ไว้สำหรับทดสอบโค้ดส่งเมล์


คลิกปุ่ม New Domain ปุ่มแรกซ้ายสุด โปรแกรมจะขึ้นหน้าต่างมาให้ท่านป้อนชื่อ domain สมมติ ท่านจะตั้งว่าอะไรก็ได้ แต่ตอนนี้ให้ตามผมก่อน ให้ตั้งชื่อว่า mailserver.com แล้วก็คลิกปุ่ม OK ออกไป


คลิกปุ่ม New User ปุ่มที่สี่จากซ้าย ป้อนชื่ออีเมล์และรหัสผ่าน แล้วก็ OK


ง่ายๆเพียงแค่นี้แหละ เครื่องของท่านก็จะมีเมล์เซิฟเวอร์ไว้ใช้ทดสอบการเขียนโค้ด PHP ส่งเมล์ แล้ว
ส่งเมล์ได้แล้ว แต่เปิดดูไม่ได้มันก็ไม่ีมีประโยชน์ เพราะเราก็ไม่รู้ว่าอีเมล์ของเราจะออกมาในรูปแบบที่ต้องการหรือไม่ ผมจะสอนท่านตั้งค่า email client เพื่อดึงอีเมล์ โดยผมจะใช้ window live mail เป็นตัวรับอีเมล์ สำหรับท่านที่ใช้อีเมล์ตัวอื่น ก็ลองดูไกด์ไลน์นี้ ท่านน่าจะทำได้ไม่ยาก
การเซต window live mail
ไปที่ Tools > Accounts… > Add จะปรากฎหน้าต่างดังภาพด้านล่างขึ้นมา ให้เลือก E-mail Account แล้วคลิก Next


ตั้งค่าตามภาพแล้วคลิก Next

Email Address : platoosom@mailserver.com
Password : 123456
ติ๊กถูก Manually configure server setting for email account

Email Address : platoosom@mailserver.com
Password : 123456
ติ๊กถูก Manually configure server setting for email account
แอคเค้าตรงนี้ก็คือแอคเค้าที่เราใส่ไว้ใน argosoft mail
Incoming server : 127.0.0.1
Outgoing server : 127.0.0.1
เสร็จแล้วคลิก Next

Outgoing server : 127.0.0.1
เสร็จแล้วคลิก Next

Finish


เสร็จทั้งสองส่วนเป็นที่เรียบร้อย ต่อไปเราก็จะมาเขียนโค้ดเพื่อทดสอบว่า เมล์เซิฟเวอร์ ของเราใช้ได้หรือเปล่า
โค้ดส่งอีเมล์
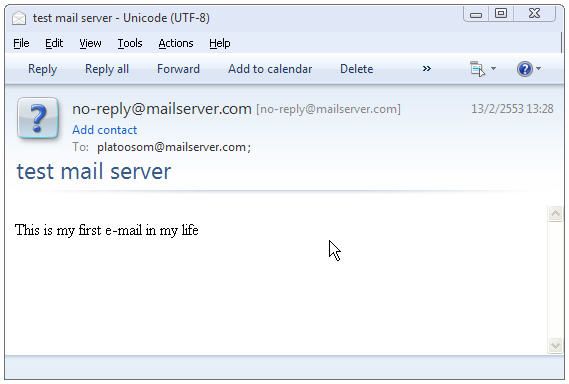
หลังจากรันโค้ดนี้แล้ว ให้ท่านไปเปิด window live mail ของท่านแล้วกดปุ่ม Sync ถ้าท่านทำทุกอย่างถูกต้องท่านจะต้องได้รับอีเมล์ 1 ฉบับเป็นอย่างน้อย แน่นอน
ถ้าหากไม่มีอีเมล์เข้า ให้ท่านไล่อ่านบทความนี้ตั้งแต่ต้นจนจบอีกครั้งหนึ่ง แล้วก็ดูว่าท่านข้ามขั้นตอนไหนไปหรือเปล่า
ไม่มีความคิดเห็น:
แสดงความคิดเห็น